LLExec INtime
LLExec for Tenasys INtime usage instructions
Prerequisites
The INtime configuration must be done as follow (See official INtime documentation for details):
- Add a running virtual network interface (typically a ven0 interface within INtime must be configured to enable communication between Windows and INtime. Additionally a Windows bridge connection between Windows and INtime interfaces can be done)
- An ethernet capable network card assigned to INtime environment (optional)
- INtime Kernel Memory must be raised to a reasonable amount of MB to handle all plugins (Tested with 1024MB, also 256MB should be ok)
Tested on:
Windows 10 + INtime 6.4.20030.1 Patch Level 20030 + Intel Ethernet Connection I217V (INtime hpe driver ie1g - Vendor:8086 Device:153B)
Installation
- Extract the LLExec_x.y.z_INtime_bin.zip file into a windows folder of the INtime machine, let's say c:\data\plc
Execution
- Start the INtime Node on the machine.
- Launch "LLExecStart_INtime.exe" from windows (Desktop Icon). Without parameters it will load the default "LLExecINtime.conf" configuration file.
Optionally you can also:
- launch "LLExecStart_INtime.exe /LLEXEC_NO_START" and then launch manually LLExec.rta using INtime RT loader with optional LLExec command line parameters
- launch "LLExecStart_INtime.exe [name.conf]" passing a custom name of the configuration file to LLExec.
Licensing
NO LICENSE
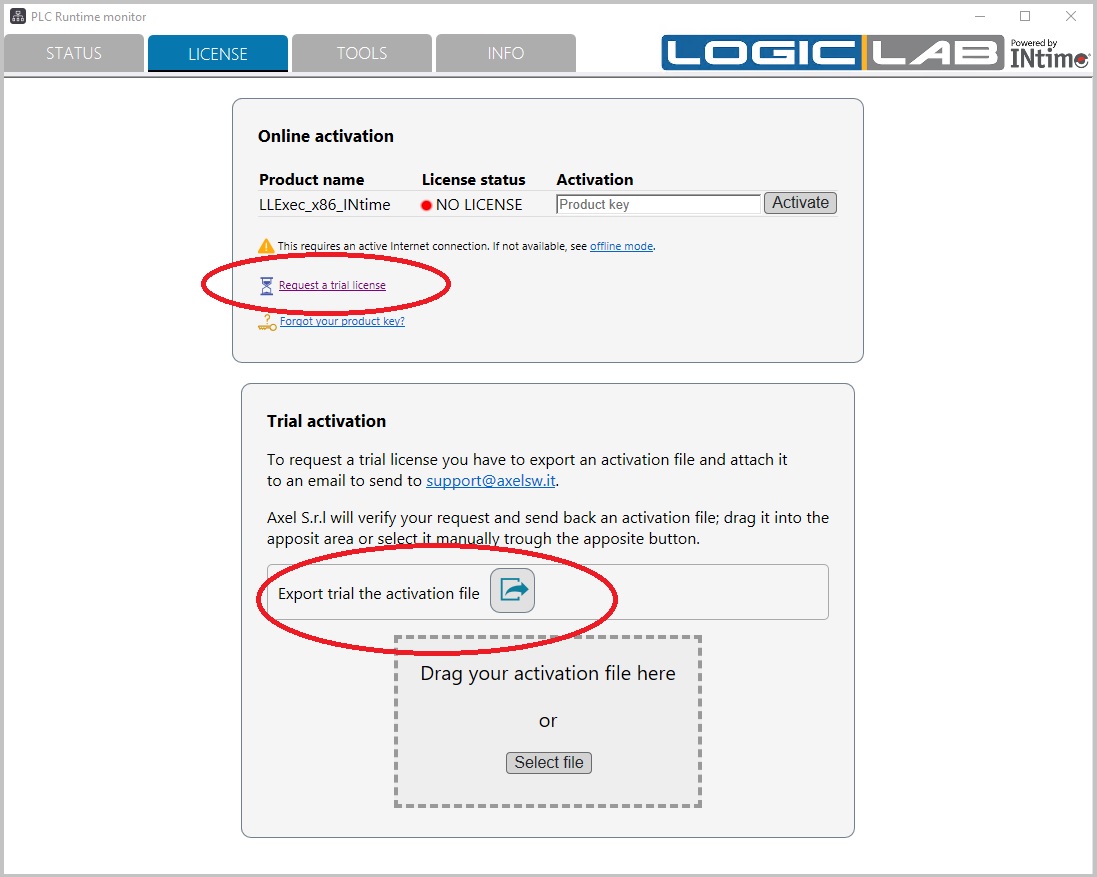
When first installing LLExec for INtime, you will be missing both INtime and LLExec license; after executing LLExec launcher you should see this kind of window:

From there you can Request a trial license to activate the DEMO version, or you can directly unlock the full version by inserting a Product Key
TRIAL VERSION
Once activated, the DEMO mode will make INtime system working for 30 days; while LLExec will be fully working for 2 hours.
After that, each time you restart your system you will get another 2 hours of DEMO mode.
To get a free trial version follow these instructions:
-
Click on the Request trial license link and export a Trial Activation File
You will obtain a .json file. - Send the .json file to support@axelsw.it, asking for a free trial license for LLExec INtime.
-
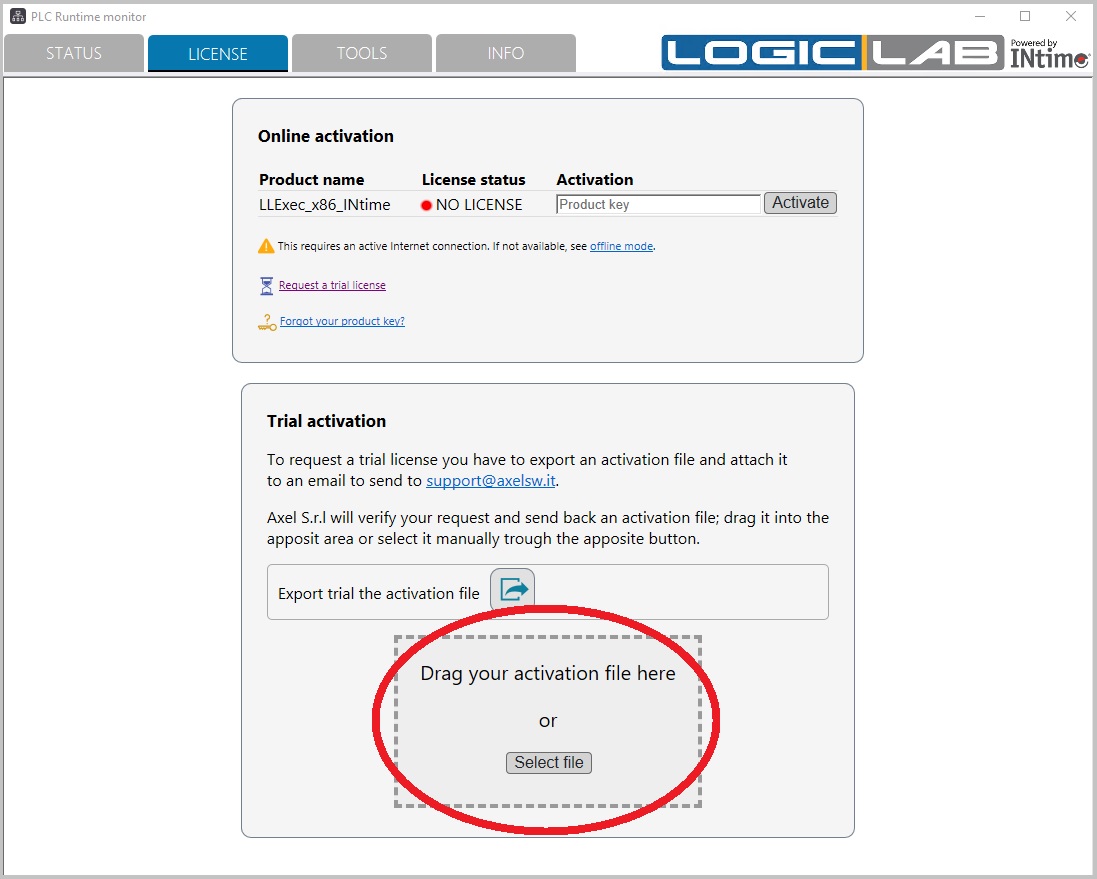
Axel will write you back sending an activated .json file; drag&drop the file into the activation area.
-
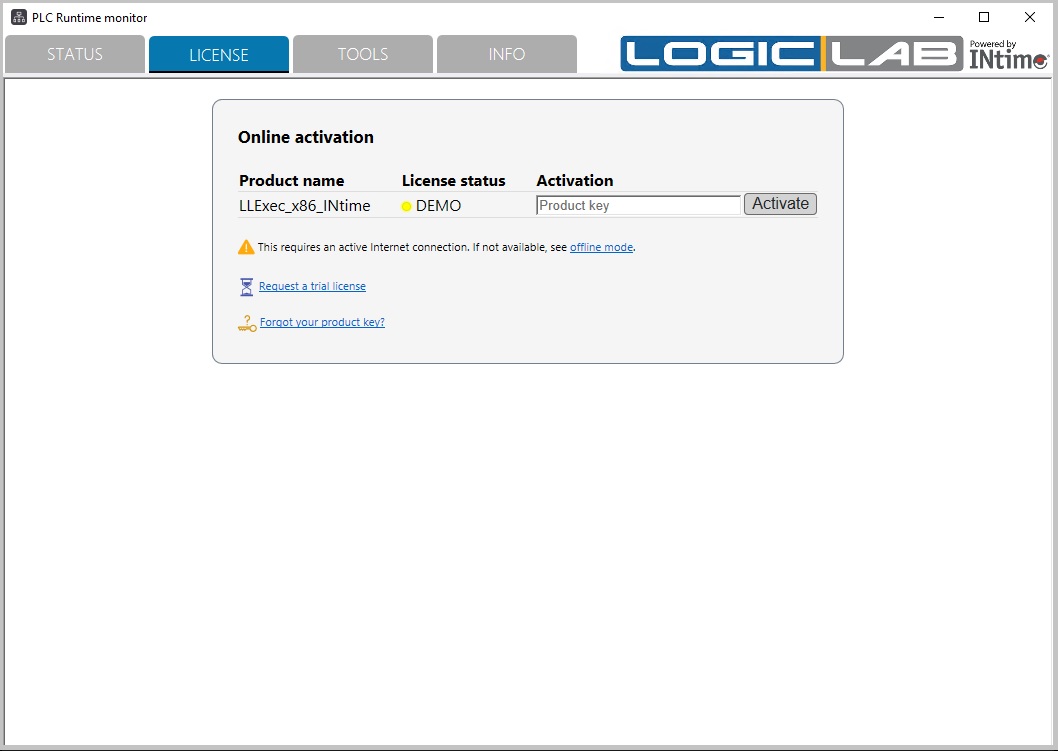
Now, under License status you should see DEMO instead of NO LICENSE.
You may need to restart the system to make the trial license takes effect.
As stated before: once activated, the DEMO mode will make INtime system working for 30 days; while LLExec will be fully working for 2 hours.
After that, each time you restart your system you will get another 2 hours of DEMO mode.


FULL LICENSE
From both NO LICENSE status and DEMO status, you can insert a valid Product key to fully unlock both INtime and LLExec without time limitations.
If you don't have already purchased a Product key, write to support@axelsw.it and ask for one.
Online activation
This is the faster way to activate your product, but requires to have a working internet connection.
Insert your Product key into
LogicLab usage
- Execute LogicLab (after intallation)
- Create a new project using the LLExec PLC runtime (INtime) target
- Configure the GDB connection using the virtual IP address of INtime (this depends on your INtime configuration, typically it is 10.1.1.2, port 5000).
- Connect to target with the upper left button
Ethercat Master example
- Prior to launch LLExec, you need to edit the LLExec.conf file and replace the port configuration in the line "<EtherCAT port="ie1g0" autorecovery="no"/>" with the name of the INtime network device used for ethercat. (eg: "ie1g0")
- Import an .esi file with the command "Tools->Import ESI".
- Click on resources tab of LogicLab, then select the "Ethercat" node and enable it with the checkbox.
- Right click on the "main network" ethercat node and select "add" to add your imported ethercat device.
- A new node for the ethercat device will appear, configure it as you like.
- Save, compile and download the project to the target.